Adding a (static) library to a project
Open the project properties and select the C/C++ Build - Settings view. Now select MCU Linker - Libraries in the tool settings tab.
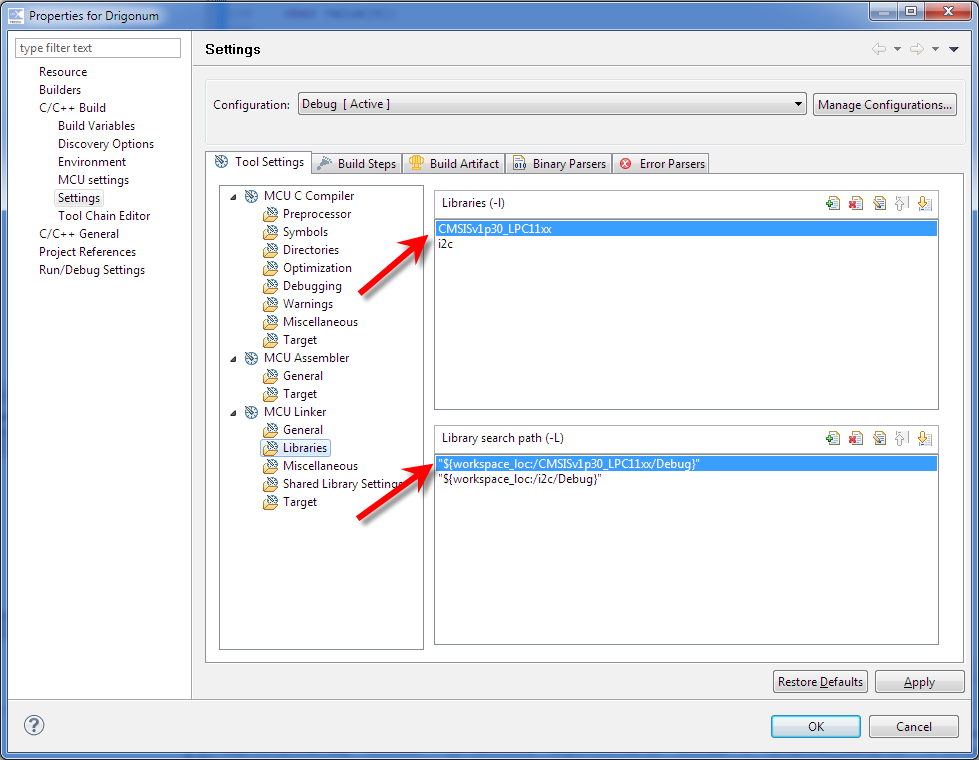
In the upper section add the library names, this is normally the same name as the project name that creates the library. Click on the "+"icon to add files. In order to arrange the order in which libraries are loaded you may change the order by using the up/down arrows.
In the lower section you have to add the path to the library by clicking on the "+" icon. Select "Workspace..." and then select the correct directory. You have to specify the complete directory ending in Debug or Release. Note that these directories must exist (e.g. libraries must have been build) before you are able to select them.
You have to repeat this step form both the Debug and the Release configurations.
Note: in order to save (flash) space during debugging, you can use a debug version of a library in a release configuration or a release version of a library in a debug configuration.